Spring JDBC
概念
Spring的JDBC模块负责数据库资源管理和错误处理,简化了开发人员对数据库的操作。
Spring JDBC通过配置数据源和JDBC模板来配置。
针对数据库操作,Spring框架提供了JdbcTemplate类,它是Spring框架数据抽象层的基础,是Spring JDBC的核心类。

JdbcAccessor提供了访问数据库使用的公共属性,例如Data Source,DataSource主要功能是获取数据库连接,还可以引入对数据库连接的缓冲池和分布式事务的支持;JdbcOperations定义了可以使用的操作集合,例如增删改查(CURD)。
Spring JDBC模块由4个包组成:
下面我们真正来用一下。
Spring JDBC实践
数据库创建
首先我们在MySQL中创建一个数据库,由于我是Mac环境,所以我直接在终端中执行SQL语句来完成。
如果你没有修改过密码,执行以下命令
mysql -uroot如果修改过密码请执行以下命令,根据提示输入密码,输入的时候看不见
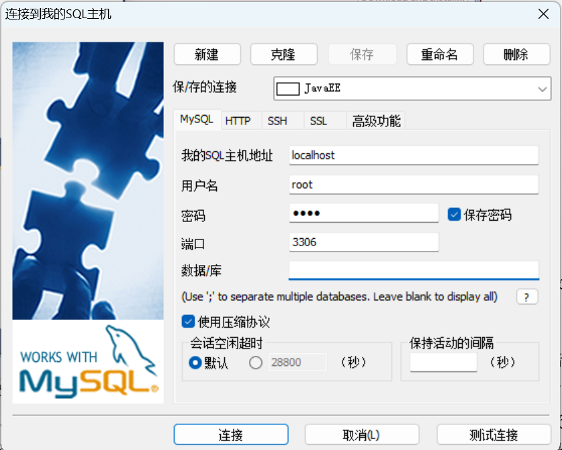
mysql -u root -p如果你是Windows可以通过sqlyog连接。
以下部分通用:
执行SQL语句创建数据库
CREATE DATABASE db_javaee;我们接下来为这个数据库创建一个单独的用户来管理它,用户名为db_javaee,密码是dbjavaeepassword。
CREATE USER 'db_javaee'@'localhost' IDENTIFIED BY 'dbjavaeepassword';这里有必要说明下,如果数据库与你开发环境在同一台机器上,这里可写'localhost',如果是远程的数据库要改为'%',即(以下同理)
CREATE USER 'db_javaee'@'%' IDENTIFIED BY 'dbjavaeepassword';给这个用户授予权限,如果是远程别忘了改成'%'
GRANT ALL ON db_javaee.* TO 'db_javaee'@'localhost';刷新权限
flush privileges;这里有个问题得注意下,如果你的MySQL版本是5.7到这里就没啥问题了。如果是MySQL8.0以及更高,则加密算法由原来的sha256_password改成了caching_sha2_password,导致连接新版本数据库报错。
新版本用户需要追加
ALERT USER 'db_javaee'@'localhost' IDENTIFIED WITH mysql_native_password by 'dbjavaeepassword';如果你root用户登陆不上也有可能是因为这个原因,这时候你就要像Mac用户一样到终端里连接,并将此处的db_javaee改为root才能在旧版sqlyog里或者navcat里连接。
项目创建
我们还是创建一个Maven项目,名称为top.cairbin.test3,然后在pom.xml里添加依赖包
<dependency>
    <groupId>org.springframework</groupId>
    <artifactId>spring-context</artifactId>
    <version>5.1.5.RELEASE</version>
</dependency>
<dependency>
    <groupId>org.springframework</groupId>
    <artifactId>spring-jdbc</artifactId>
    <version>5.1.5.RELEASE</version>
</dependency>
<dependency>
    <groupId>mysql</groupId>
    <artifactId>mysql-connector-java</artifactId>
    <version>8.0.33</version>
</dependency>
<dependency>
    <groupId>org.springframework</groupId>
    <artifactId>spring-test</artifactId>
    <version>5.1.5.RELEASE</version>
    <scope>test</scope>
</dependency>注意这里的mysql-connector-java请用较新的,我之前用5.1.47会报错。
同样创建与src平级的resources目录并use as source folder,在里面创建app.xml(跟我们之前的AppCtx.xml一样,名称不固定随你便,不过在main中的必须与这里的文件名一致),并写入如下内容
<?xml version="1.0" encoding="UTF-8"?>
<beans xmlns="http://www.springframework.org/schema/beans"
    xmlns:xsi="http://www.w3.org/2001/XMLSchema-instance"
    xmlns:context="http://www.springframework.org/schema/context"
    xsi:schemaLocation="http://www.springframework.org/schema/beans
  http://www.springframework.org/schema/beans/spring-beans.xsd
  http://www.springframework.org/schema/context
  http://www.springframework.org/schema/context/spring-context.xsd">
    <!-- 指定需要扫描的包,使注解生效 -->
    <context:component-scan
        base-package="top.cairbin.test3" />
    <!-- 配置dataSource -->
    <bean id="dataSource"
        class="org.springframework.jdbc.datasource.DriverManagerDataSource">
        <!--数据库驱动 -->
        <property name="driverClassName"
            value="com.mysql.jdbc.Driver" />
        <!--连接数据库的url -->
        <property name="url"
            value="jdbc:mysql://localhost:3306/db_javaee" />
        <!--连接数据库的用户名 -->
        <property name="username" value="db_javaee" />
        <!--连接数据库的密码 -->
        <property name="password" value="dbjavaeepassword" />
    </bean>
    <!-- 配置JDBC模板 -->
    <bean id="jdbcTemplate"
        class="org.springframework.jdbc.core.JdbcTemplate">
        <!-- 默认必须使用数据源 -->
        <property name="dataSource" ref="dataSource" />
    </bean>
</beans>如果你数据库用户名和密码设置与我不一样,记得修改这里的value属性。
在App.java中测试
package top.cairbin.test3;

import org.springframework.context.ApplicationContext;
import org.springframework.context.support.ClassPathXmlApplicationContext;
import org.springframework.jdbc.core.JdbcTemplate;


public class App
{
    public static void main( String[] args )
    {
        ApplicationContext applicationContext = new ClassPathXmlApplicationContext("app.xml");
                // 获取JdbcTemplate实例
                JdbcTemplate jdTemplate =
                       (JdbcTemplate) applicationContext.getBean("jdbcTemplate");
                // 使用execute()方法执行SQL语句,创建用户账户管理表account
                jdTemplate.execute("create table account(" +
                                     "id int primary key auto_increment," +
                                     "username varchar(50)," +
                                     "balance double)");
                System.out.println("账户表account创建成功!");

    }
}点击运行按钮后就可以看到表创建成功了

编写测试
我们创建一个Account测试类
package top.cairbin.test3;

public class Account {
    private int id;       // 账户id
    private String username; // 用户名
    private double balance;  // 账户余额
    public Integer getId() {
        return id;
    }
    public void setId(Integer id) {
        this.id = id;
    }
    public String getUsername() {
        return username;
    }
    public void setUsername(String username) {
        this.username = username;
    }
    public Double getBalance() {
        return balance;
    }
    public void setBalance(Double balance) {
        this.balance = balance;
    }
    public String toString() {
        return "Account [id=" + id + ", "
                + "username=" + username +
                ", balance=" + balance + "]";
    }
}再建立一个IAccountDao接口
package top.cairbin.test3;

import java.util.List;

public interface IAccountDao {
    // 添加
    public int addAccount(Account account);
    // 更新
    public int updateAccount(Account account);
    // 删除
    public int deleteAccount(int id);
    // 通过id查询
    public Account findAccountById(int id);
    // 查询所有账户
    public List<Account> findAllAccount();
}然后定义AccountDao类实现这个接口
package top.cairbin.test3;
import java.util.List;

import org.springframework.beans.factory.annotation.Autowired;
import org.springframework.jdbc.core.BeanPropertyRowMapper;
import org.springframework.jdbc.core.JdbcTemplate;
import org.springframework.jdbc.core.RowMapper;
import org.springframework.stereotype.Repository;

@Repository("accountDao")
public class AccountDao implements IAccountDao {
    // 声明JdbcTemplate属性并添加注解
    @Autowired
private JdbcTemplate jdbcTemplate;
    // 添加账户
    public int addAccount(Account account) {
        // 定义SQL
        String sql = "insert into account(username,balance) value(?,?)";
        // 定义数组来存放SQL语句中的参数
        Object[] obj = new Object[] {
                           account.getUsername(),
                           account.getBalance()
         };
        // 执行添加操作,返回的是受SQL语句影响的记录条数
        int num = this.jdbcTemplate.update(sql, obj);
        return num;
    }
    // 更新账户
    public int updateAccount(Account account) {
        // 定义SQL
        String sql = "update account set username=?,balance=? where id = ?";
        // 定义数组来存放SQL语句中的参数
        Object[] params = new Object[] {
                               account.getUsername(),
                               account.getBalance(),
                               account.getId()
          };
        // 执行添加操作,返回的是受SQL语句影响的记录条数
        int num = this.jdbcTemplate.update(sql, params);
        return num;
    }
    // 删除账户
    public int deleteAccount(int id) {
        // 定义SQL
        String sql = "delete from account where id = ? ";
        // 执行添加操作,返回的是受SQL语句影响的记录条数
        int num = this.jdbcTemplate.update(sql, id);
        return num;
    }

    // 通过id查询账户数据信息
    public Account findAccountById(int id) {
        //定义SQL语句
        String sql = "select * from account where id = ?";
        // 创建一个新的BeanPropertyRowMapper对象
        RowMapper<Account> rowMapper =
    new BeanPropertyRowMapper<Account>(Account.class);
        // 将id绑定到SQL语句中,并通过RowMapper返回一个Object类型的单行记录
        return this.jdbcTemplate.queryForObject(sql, rowMapper, id);
    }
    // 查询所有账户信息
    public List<Account> findAllAccount() {
        // 定义SQL语句
        String sql = "select * from account";
        // 创建一个新的BeanPropertyRowMapper对象
        RowMapper<Account> rowMapper =
    new BeanPropertyRowMapper<Account>(Account.class);
        // 执行静态的SQL查询,并通过RowMapper返回结果
        return this.jdbcTemplate.query(sql, rowMapper);
    }

}创建测试类SpringJdbcTest,编写测试单元
package top.cairbin.test3;

import org.junit.jupiter.api.Test;
import org.springframework.context.ApplicationContext;
import org.springframework.context.support.ClassPathXmlApplicationContext;
import org.springframework.jdbc.core.JdbcTemplate;

public class SpringJdbcTest {
    @Test
    public void mainTest() {
        // 加载配置文件
        ApplicationContext applicationContext =
                new ClassPathXmlApplicationContext("app.xml");
        // 获取JdbcTemplate实例
        JdbcTemplate jdTemplate =
                (JdbcTemplate) applicationContext.getBean("jdbcTemplate");
        // 使用execute()方法执行SQL语句,创建用户账户管理表account
        jdTemplate.execute("create table account(" +
                               "id int primary key auto_increment," +
                               "username varchar(50)," +
                               "balance double)");
        System.out.println("账户表account创建成功!");
    }

    @Test
    public void addAccountTest() {
        // 加载配置文件
        ApplicationContext applicationContext =
                new ClassPathXmlApplicationContext("app.xml");
        // 获取AccountDao实例
        IAccountDao accountDao =
                (IAccountDao) applicationContext.getBean("accountDao");
        // 创建Account对象,并向Account对象中添加数据
        Account account = new Account();
        account.setUsername("tom");
        account.setBalance(1000.00);
        // 执行addAccount()方法,并获取返回结果
        int num = accountDao.addAccount(account);
        if (num > 0) {
            System.out.println("成功插入了" + num + "条数据!");
        } else {
            System.out.println("插入操作执行失败!");
        }
    }

    @Test
    public void updateAccountTest() {
        // 加载配置文件
        ApplicationContext applicationContext =
                new ClassPathXmlApplicationContext("applicationContext.xml");
        // 获取AccountDao实例
        IAccountDao accountDao =
                (IAccountDao) applicationContext.getBean("accountDao");
        // 创建Account对象,并向Account对象中添加数据
        Account account = new Account();
        account.setId(1);
        account.setUsername("tom");
        account.setBalance(2000.00);
        // 执行updateAccount()方法,并获取返回结果
        int num = accountDao.updateAccount(account);
        if (num > 0) {
            System.out.println("成功修改了" + num + "条数据!");
        } else {
            System.out.println("修改操作执行失败!");
        }
    }

    @Test
    public void deleteAccountTest() {
        // 加载配置文件
        ApplicationContext applicationContext =
                new ClassPathXmlApplicationContext("app.xml");
        // 获取AccountDao实例
        IAccountDao accountDao =
                (IAccountDao) applicationContext.getBean("accountDao");
        // 执行deleteAccount()方法,并获取返回结果
        int num = accountDao.deleteAccount(1);
        if (num > 0) {
            System.out.println("成功删除了" + num + "条数据!");
        } else {
            System.out.println("删除操作执行失败!");
        }
    }
}在Eclipse中src/main/java使用@Test注解需要进行配置:右键项目-> properties -> Java Build Path -> Libraries -> Add Library -> JUint

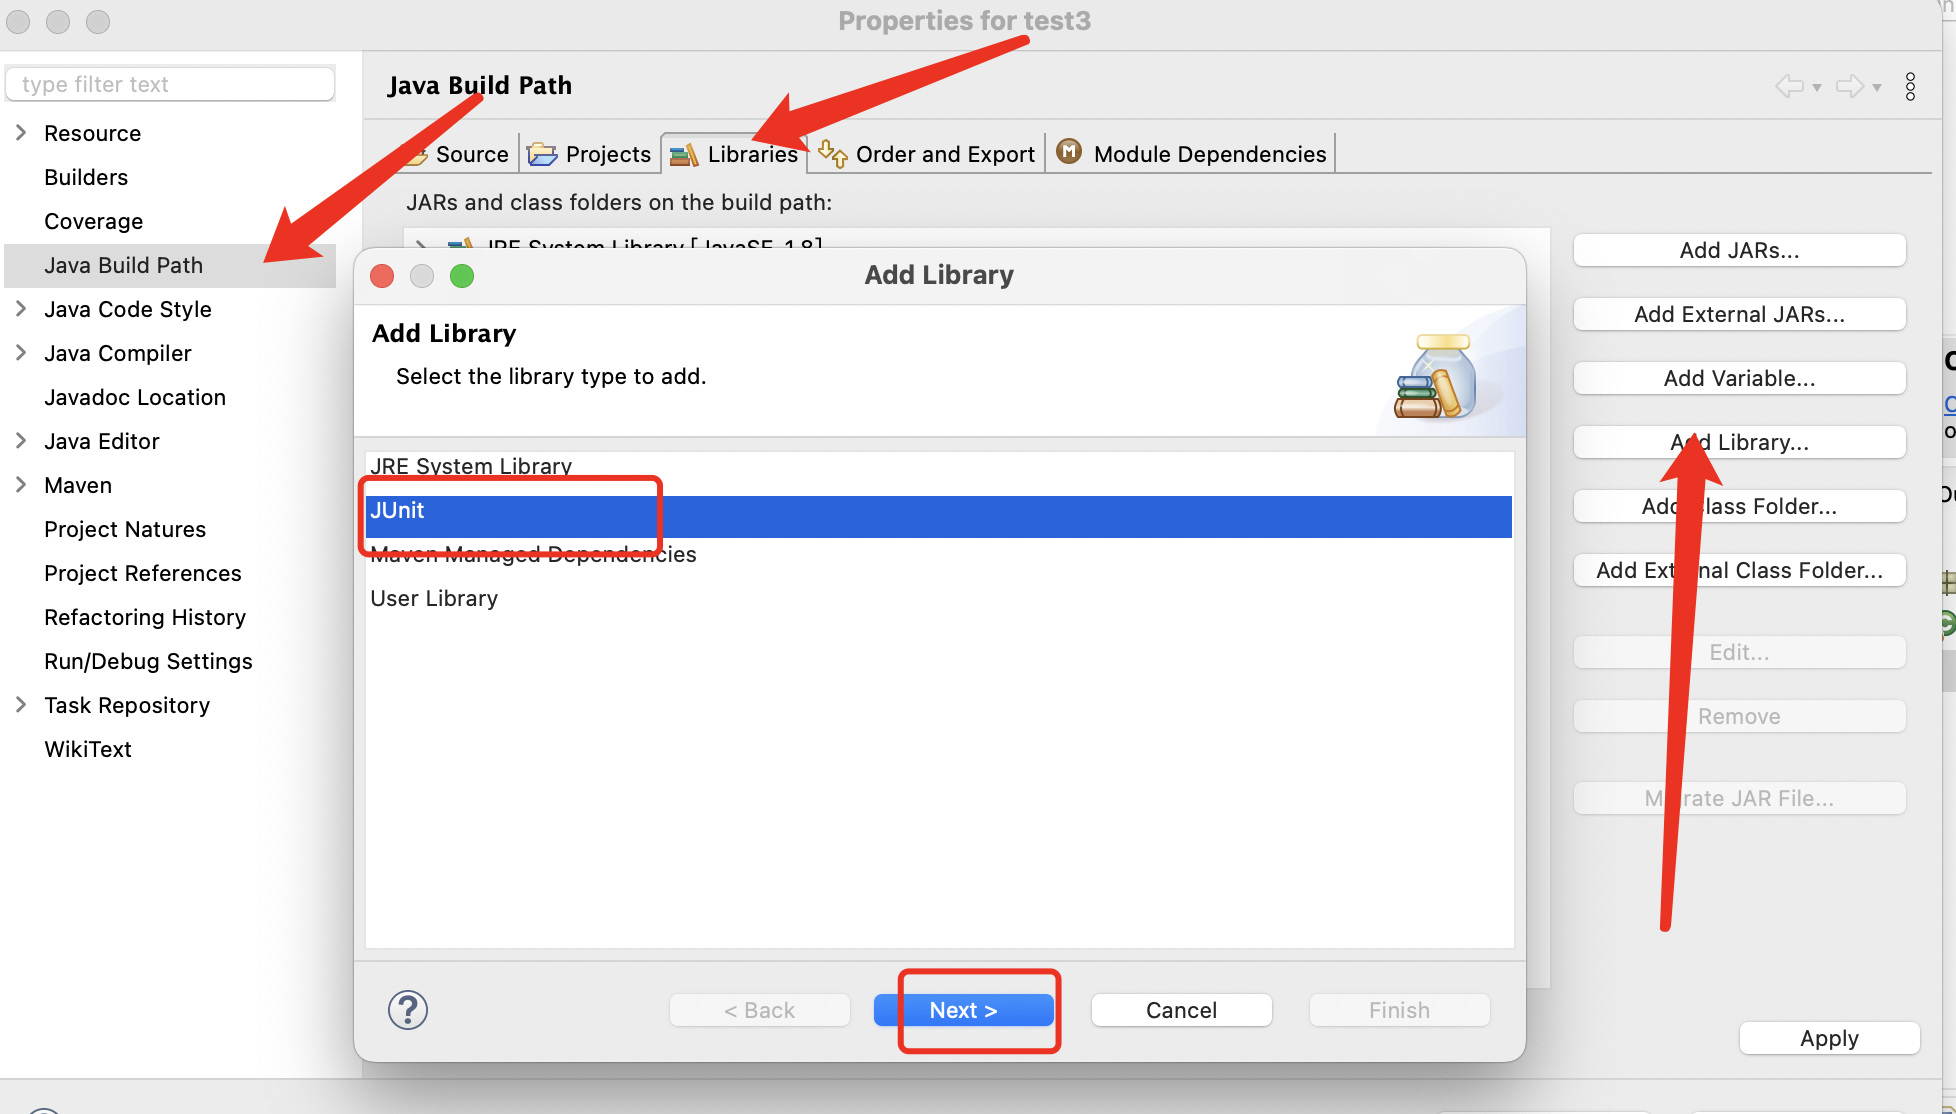
添加完成后导入包import java.util.List;就能用了。
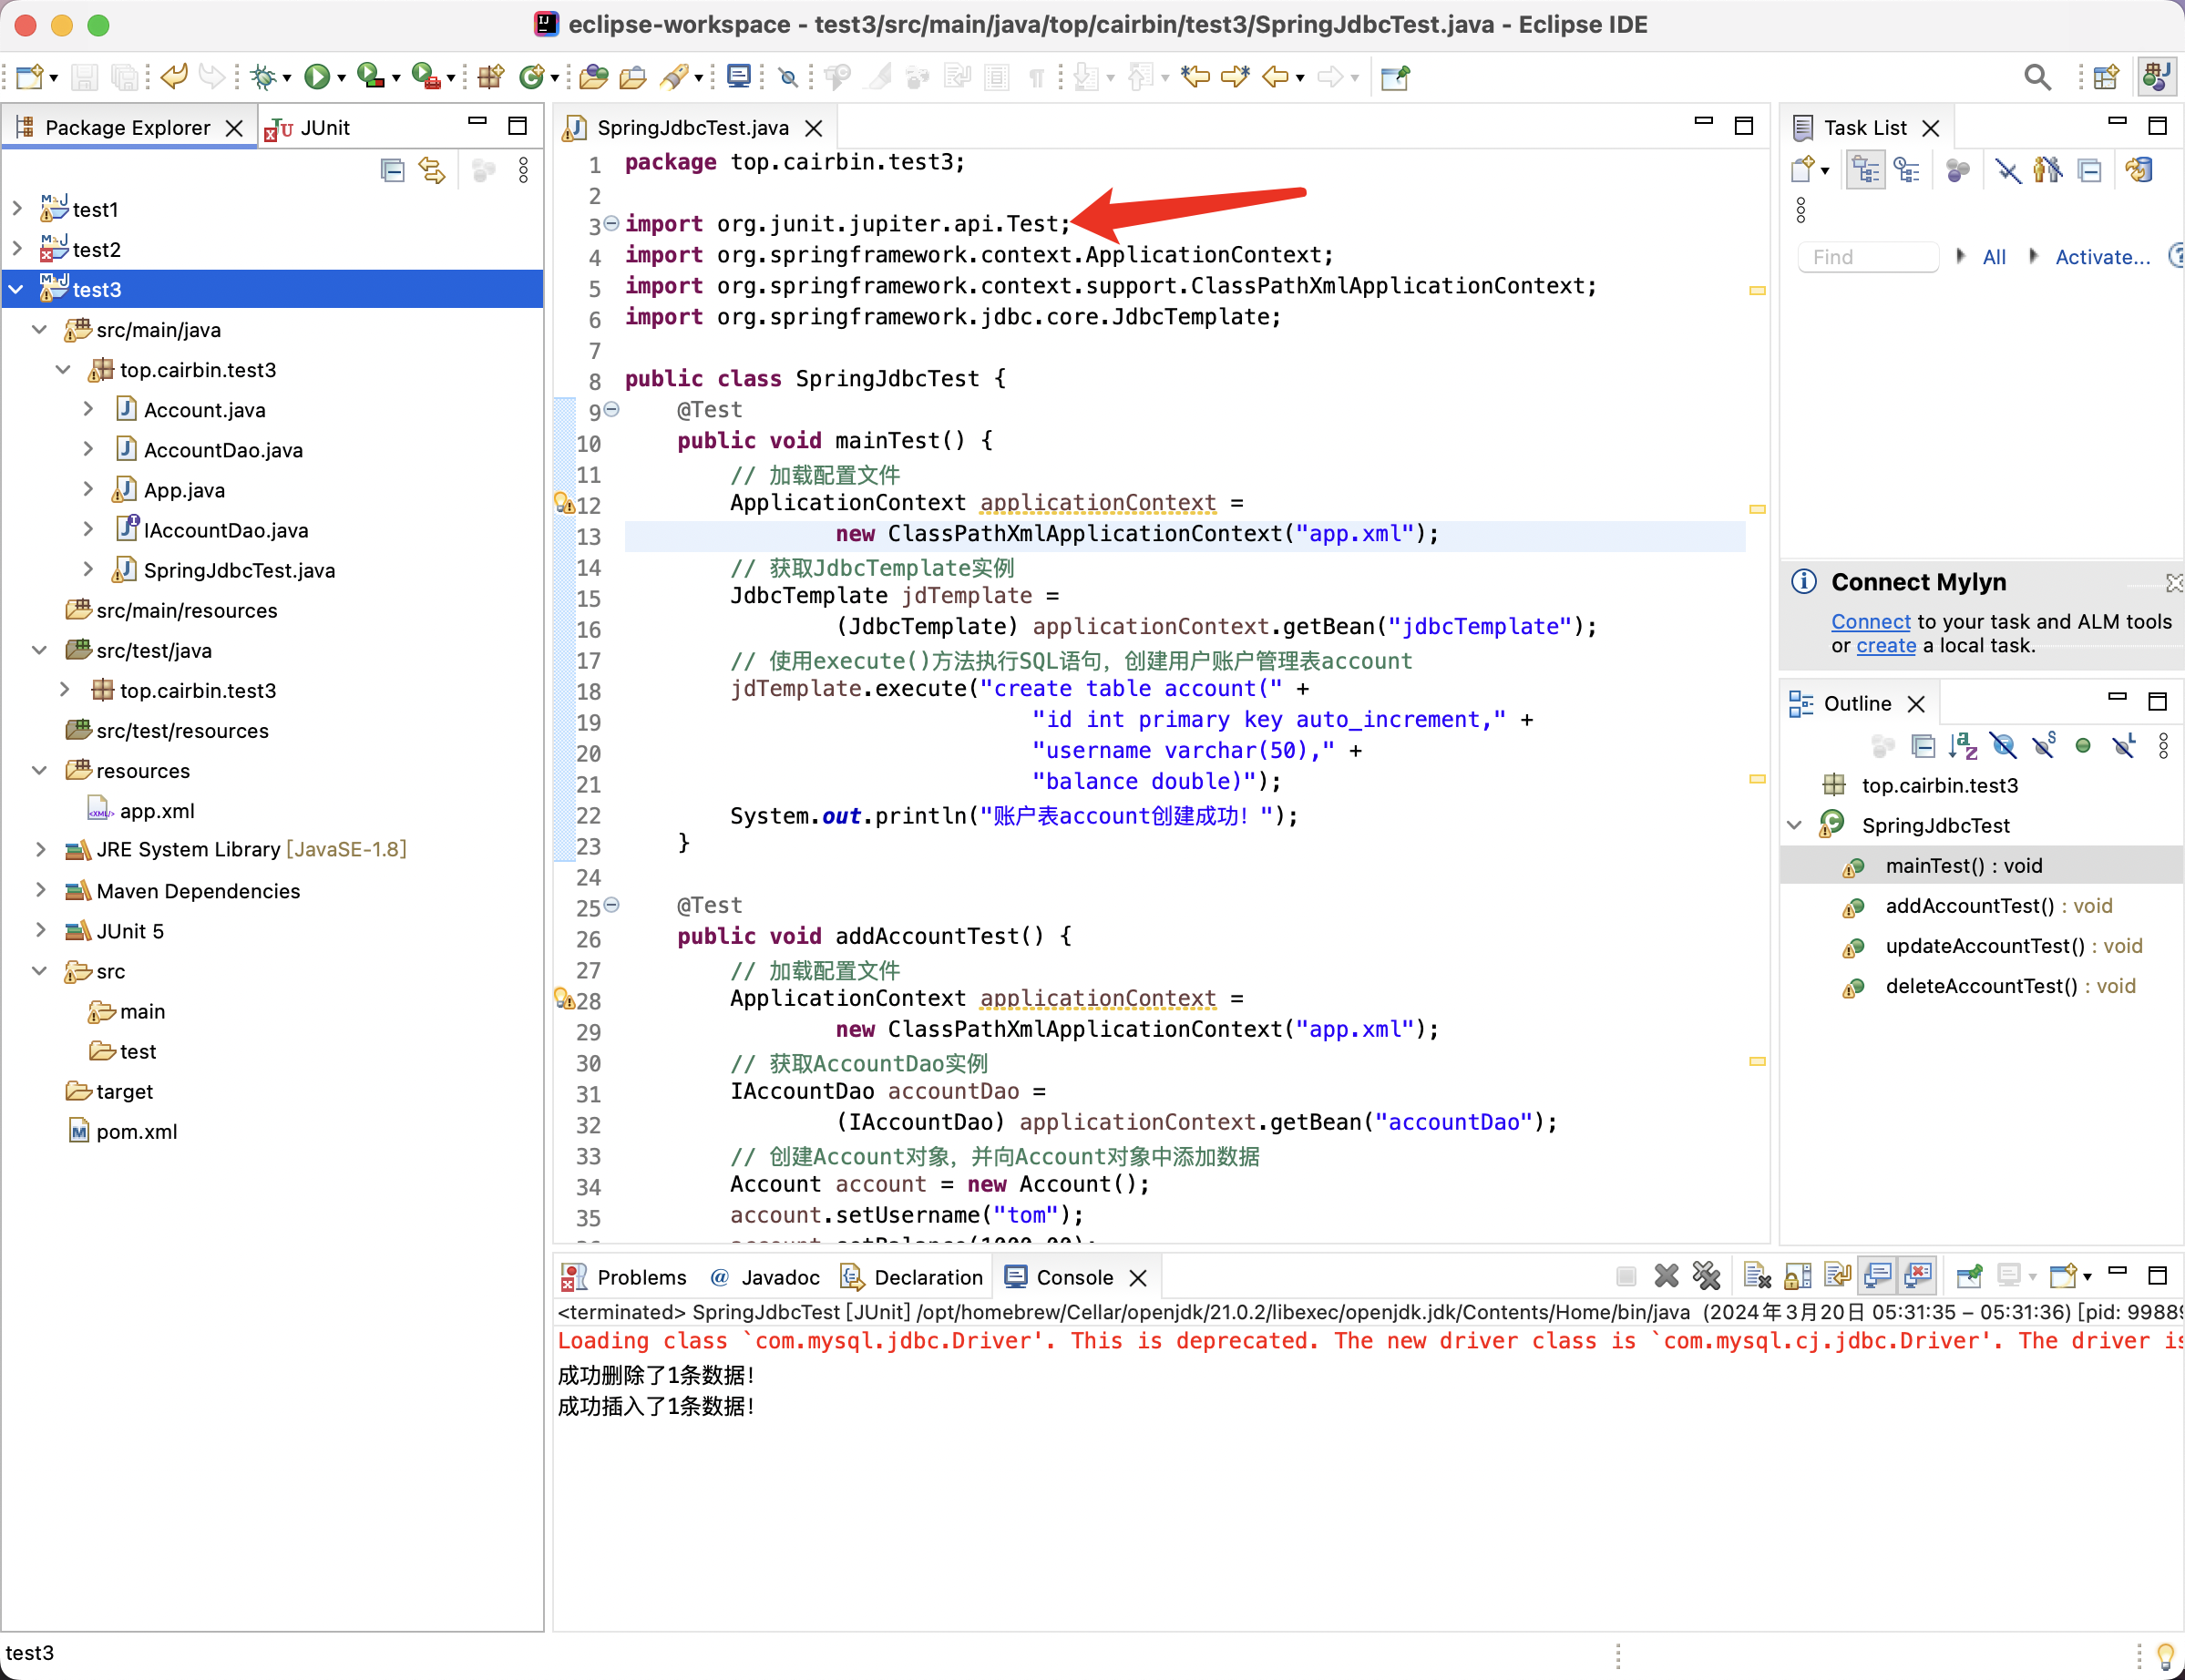
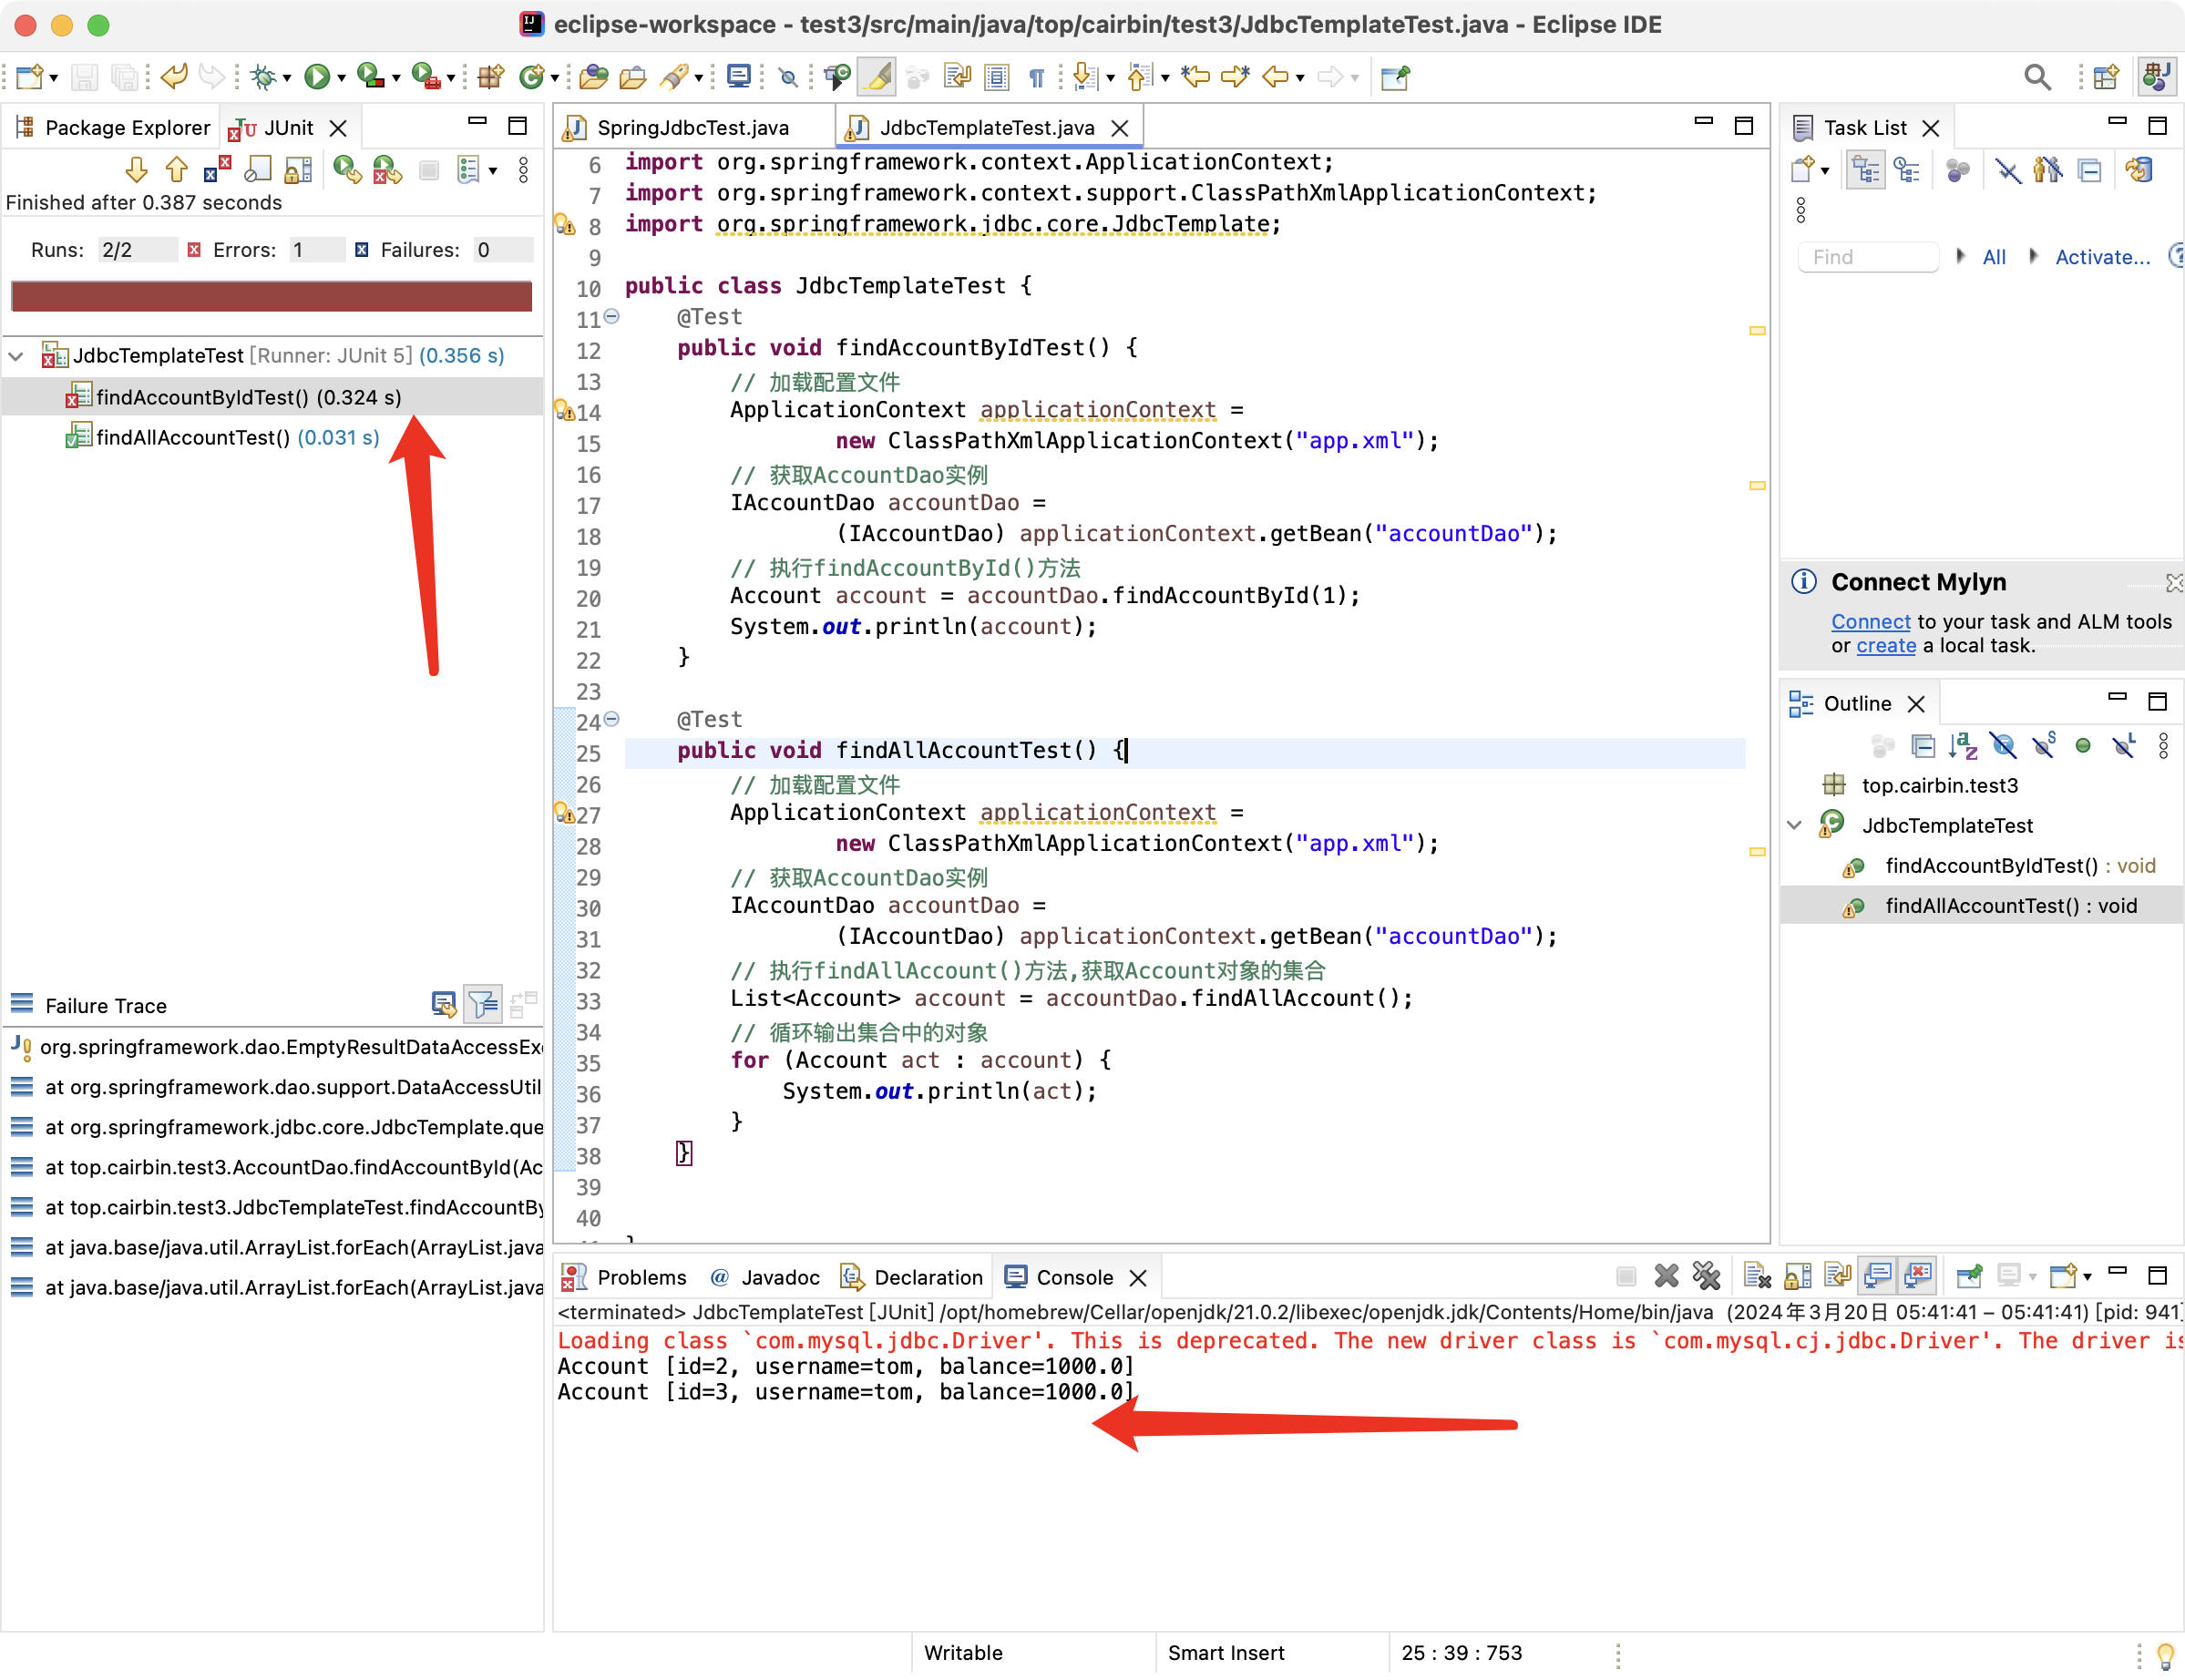
点击运行,我这里已经测试了多次了,结果可能跟你的不一样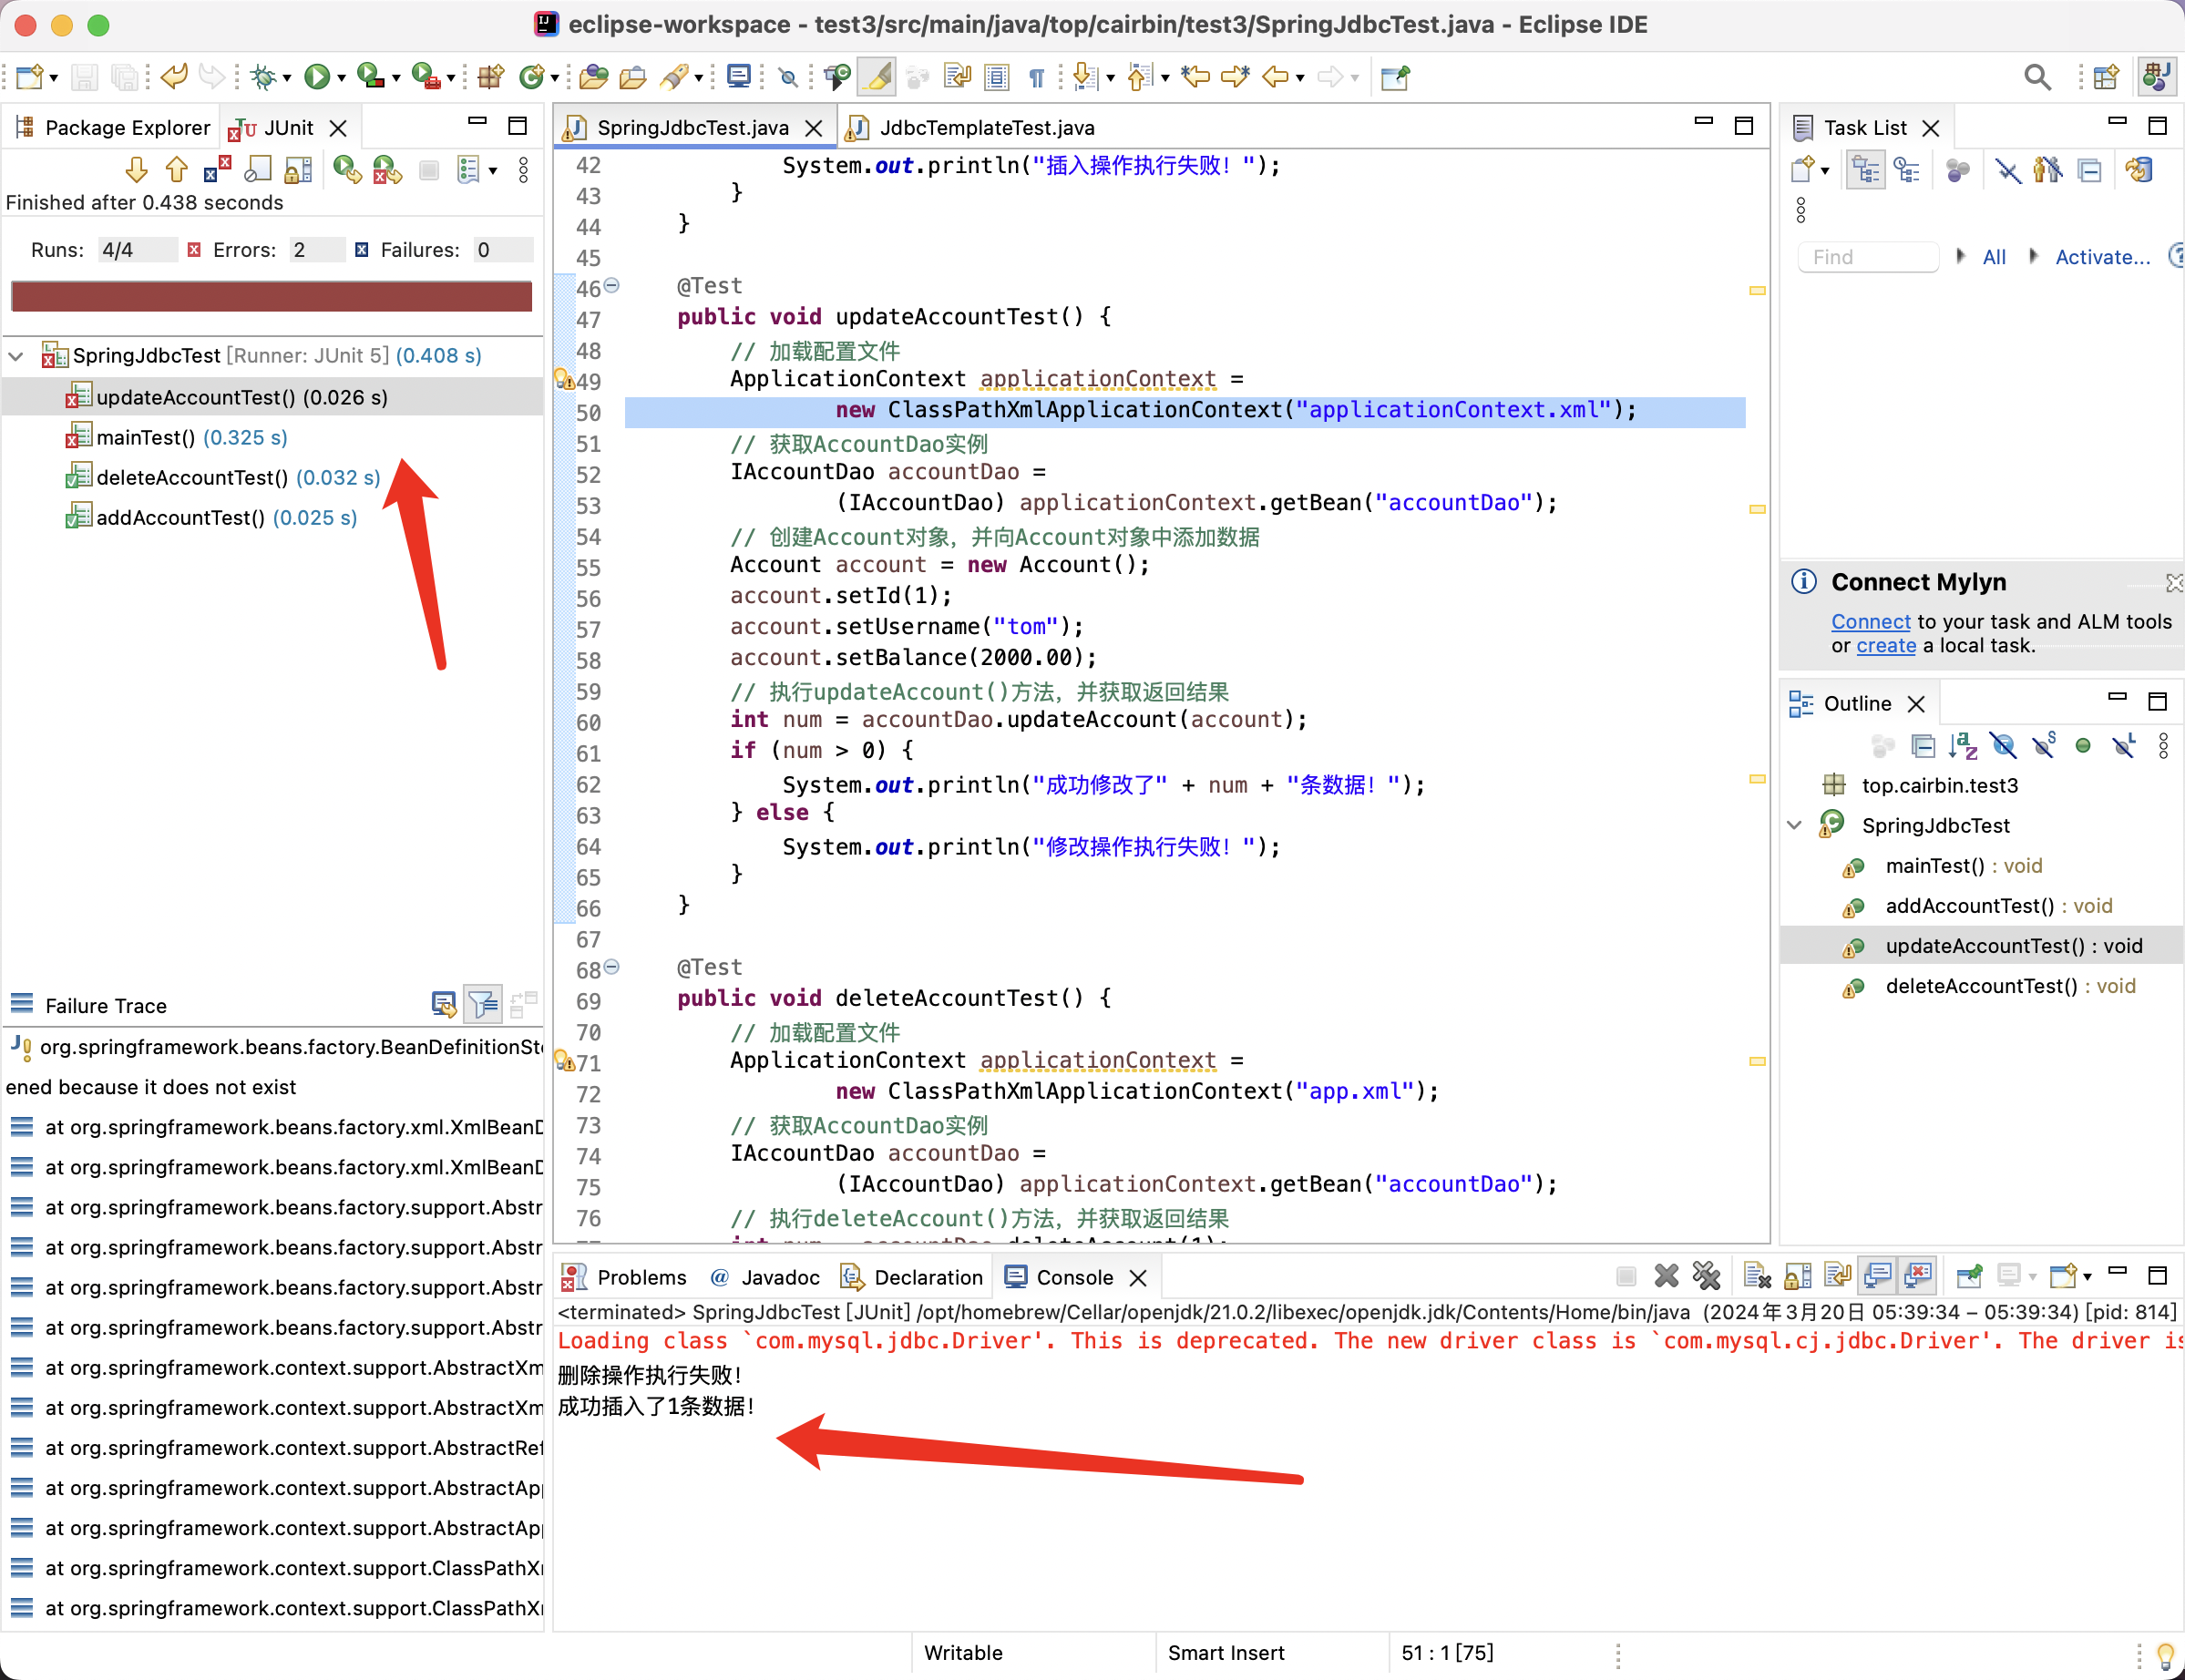
从图中左侧可以看到两个方法成功了,两个方法失败了。失败的方法图标又个红色的叉号。
我们再创建一个JdbcTemplateTest类,测试下查询方法
package top.cairbin.test3;

import java.util.List;

import org.junit.jupiter.api.Test;
import org.springframework.context.ApplicationContext;
import org.springframework.context.support.ClassPathXmlApplicationContext;
import org.springframework.jdbc.core.JdbcTemplate;

public class JdbcTemplateTest {
    @Test
    public void findAccountByIdTest() {
        // 加载配置文件
        ApplicationContext applicationContext =
                new ClassPathXmlApplicationContext("app.xml");
        // 获取AccountDao实例
        IAccountDao accountDao =
                (IAccountDao) applicationContext.getBean("accountDao");
        // 执行findAccountById()方法
        Account account = accountDao.findAccountById(1);
        System.out.println(account);
    }

    @Test
    public void findAllAccountTest() {
        // 加载配置文件
        ApplicationContext applicationContext =
                new ClassPathXmlApplicationContext("app.xml");
        // 获取AccountDao实例
        IAccountDao accountDao =
                (IAccountDao) applicationContext.getBean("accountDao");
        // 执行findAllAccount()方法,获取Account对象的集合
        List<Account> account = accountDao.findAllAccount();
        // 循环输出集合中的对象
        for (Account act : account) {
            System.out.println(act);
        }
    }
}
关于SpringTest
在Spring中使用Junit测试,每一个测试方法都会初始化Spring容器,导致容器被初始化多次,需要通过ctx.getBean()获取测试Bean。
SpringTest可以解决上面的问题,通过在类之上添加注解即可
@RunWith(SpringJUnit4ClassRunner.class)
@ContextConfiguration(locations="classpath:applicationContext.xml")这里的Junit版本为4.12,需要修改pom.xml。
此处不对该功能过多解释。
