注意事项
- 对于 macOS 和 Linux用户如果权限报错请在命令前添加sudo
安装Nodejs
- 访问官网https://nodejs.org
- 我们可以看到有“LTS”(长期支持版)和“Current”(当前发布版)
- LTS比较稳定,Current包含最新特性,这里我们选择LTS版本
- 下载后安装后,打开命令行分别输入下方命令,出现版本号即成功
node -v
npm -v
安装hexo
使用cnpm
国内因为网络问题npm安装较慢,所以我们改用淘宝源的cnpm
npm install -g cnpm --registry=https://registry.npm.taobao.org然后
cnpm -v出现版本号
hexo安装
输入命令
cnpm install -g hexo-cli出现warning提示忽略就行
hexo初始化
创建你博客的文件夹,利用命令行进入该目录输入以下命令
hexo init安装git部署插件
此插件用于部署到远端
cnpm install --save hexp-deployer-git本地启动
hexo s从浏览器输入localhost:4000就能看到预览
创建文章
hexo n "你的文章名字"生成文件在 你创建的文件夹/source/_posts 里
使用markdown编辑器编辑文章即可(此处你需要掌握markdown语法)
部署到GitHub
创建GitHub Page
- 登陆GitHub
- 点击右上角+,创建仓库
- 仓库名(Repository name)格式必须为 你的github昵称.github.io
- 点击“创建仓库”(Create repository)
配置文件
编辑你创建的文件夹下的 _config.yml 文件
填写github仓库地址
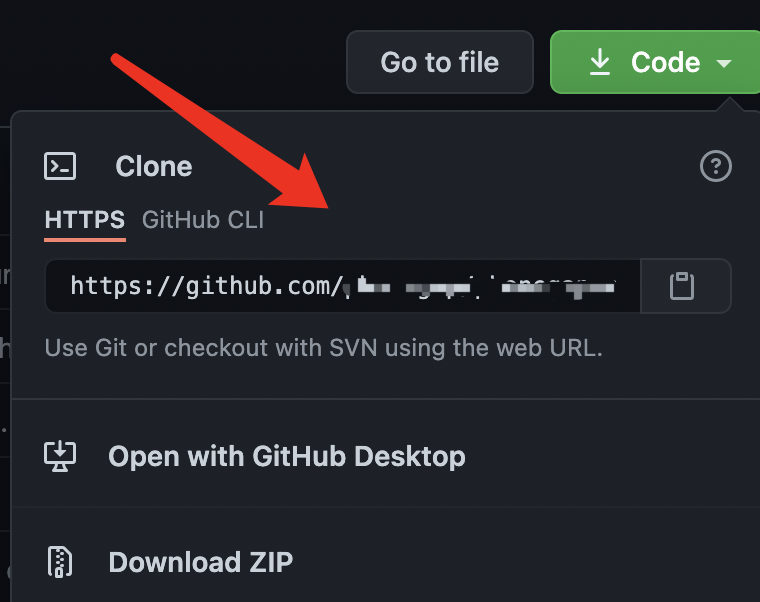
内容如下:
#此处填写你的博客标题
title:
subtitle: ''
description: ''
keywords: null
#博客作者
author:
#页面语言
language: zh-CN
timezone: ''
#博客的url
url:
root: /
permalink: ':year/:month/:day/:title/'
permalink_defaults: null
pretty_urls:
  trailing_index: true
  trailing_html: true
source_dir: source
public_dir: public
tag_dir: tags
archive_dir: archives
category_dir: categories
code_dir: downloads/code
i18n_dir: ':lang'
skip_render: null
new_post_name: ':title.md'
default_layout: post
titlecase: false
external_link:
  enable: true
  field: site
  exclude: ''
filename_case: 0
render_drafts: false
post_asset_folder: false
relative_link: false
future: true
highlight:
  enable: true
  line_number: true
  auto_detect: false
  tab_replace: ''
  wrap: true
  hljs: false
prismjs:
  enable: false
  preprocess: true
  line_number: true
  tab_replace: ''
index_generator:
  path: ''
  per_page: 10
  order_by: '-date'
default_category: uncategorized
category_map: null
tag_map: null
meta_generator: true
date_format: YYYY-MM-DD
time_format: HH:mm:ss
updated_option: mtime
per_page: 10
pagination_dir: page
include: null
exclude: null
ignore: null
#博客的主题,注意名称要与themes文件夹下主题文件夹名称一致
theme: icarus
#提交仓库
deploy:
  - type: git
  #此处填写仓库地址
    repo:
    #仓库分支
    branch: master
推送到GitHub
hexo d注意:在这个过程中会要求输入GitHub的账号和密码
域名配置
1.服务商设置
在你的服务商购买域名,并CNAME解析到GitHub上
2.本地source目录配置
在source目录下创建名称为CNAME的文件内容填写你的域名(不要加http或https)
然后再次提交
hexo d